MyVideoSpot Digital Signs run through a custom Chrome extension or through a progressive web app for Chrome kiosks.
To use the extension designed for Chrome browsers:
- Install the MyVideoSpot Digital Sign Chrome Extension.
- Go to Manage Extensions, click the Details button, and enable Allow Access to File URLs.
- In MyVideoSpot, open your sign and locate the Digital Sign Credentials section.
- Copy the Sign ID and API Key into the extension settings.
- (Optional) Adjust frequency, captions, or mute settings.
- Click Save Sign Settings, then click Start Sign.
The extension will fetch and play your sign content automatically.
To add a digital sign to a Chrome kiosk setup:
You may have to adjust these instructions for your organization’s setup, but below is what is considered best practices to ensure success.
- Login to your Google Admin panel.
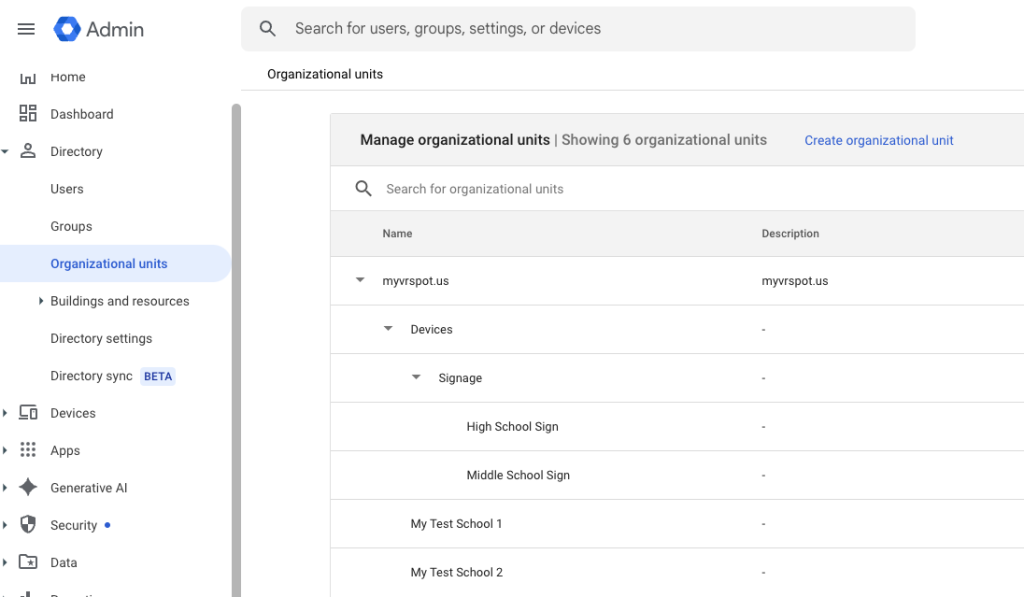
- Navigate to Directory > Organizational Units.
- Create an OU specifically for your signs within your Devices OU.
- Within the signage OU, create folders for each of your signs. Match the name of the folders with the name of the sign inside MyVideoSpot for clarity.
- Navigate to Devices > Chrome > Devices.
- Place your devices within the OU folders you created in step 4 so they match the signs you want displaying on them.
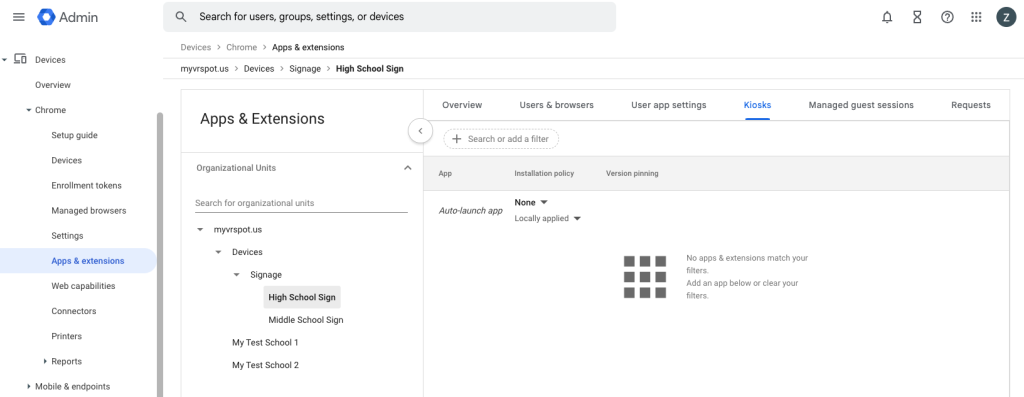
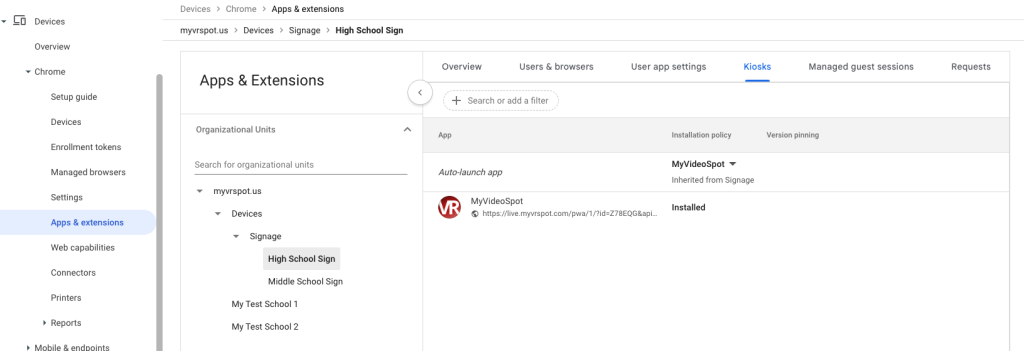
- Navigate to Devices > Chrome > Apps & extensions.
- Choose the sign you want to work within your Organizational Units and then select the Kiosks tab.
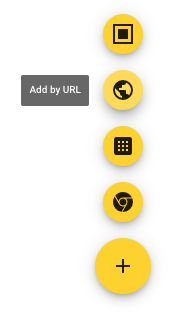
- Click on the yellow plus symbol in the lower right and select Add by URL (globe icon).
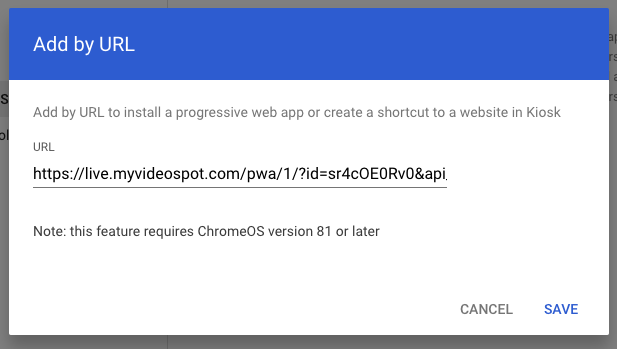
- Copy the Progressive Web App Link URL from the sign’s page within MyVideoSpot and paste it in the Add by URL pop-up’s field and click Save.
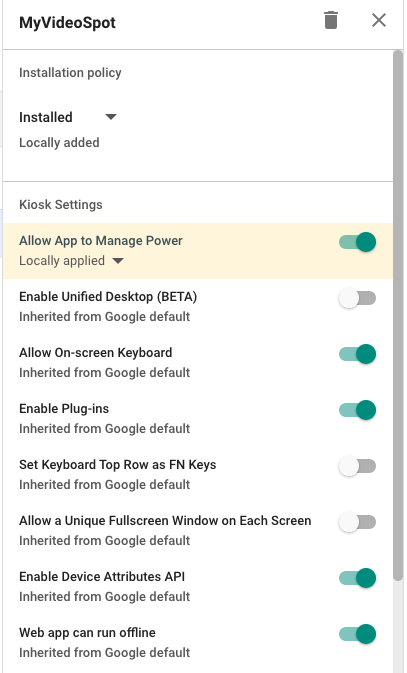
- Under the Kiosk Settings, toggle on Allow App to Manage Power.
- Under Auto-launch app’s Installation policy, change ‘None’ to ‘MyVideoSpot’ and click Save in the upper right corner.
- At this point, you can repeat steps 8-12 for any other signs that need to be managed.
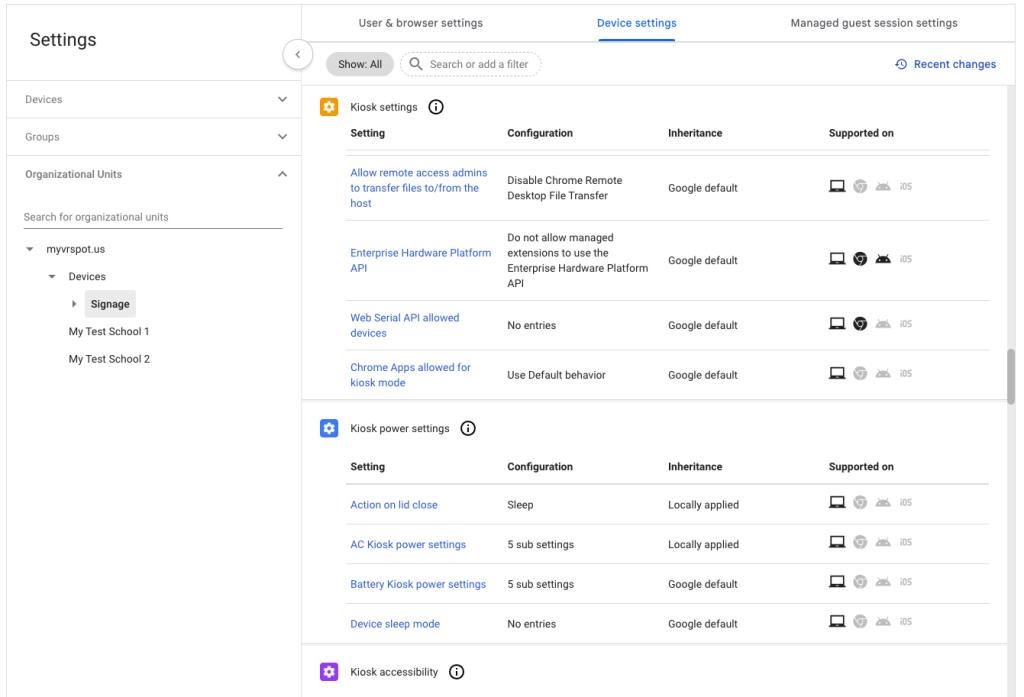
- Once your sign information is all added, you need to adjust some settings for your device by navigating to Devices > Chrome > Settings.
- Under the Organizational Units section, select the folder that all your signs are within (e.g. Devices/Signage).
- Selecting the parent Signage folder allows for updating all your device settings at once so you don’t need to go through each device individually.
- Select the Device Settings tab and scroll down to the Kiosk power settings section.
- Select AC Kiosk power settings.
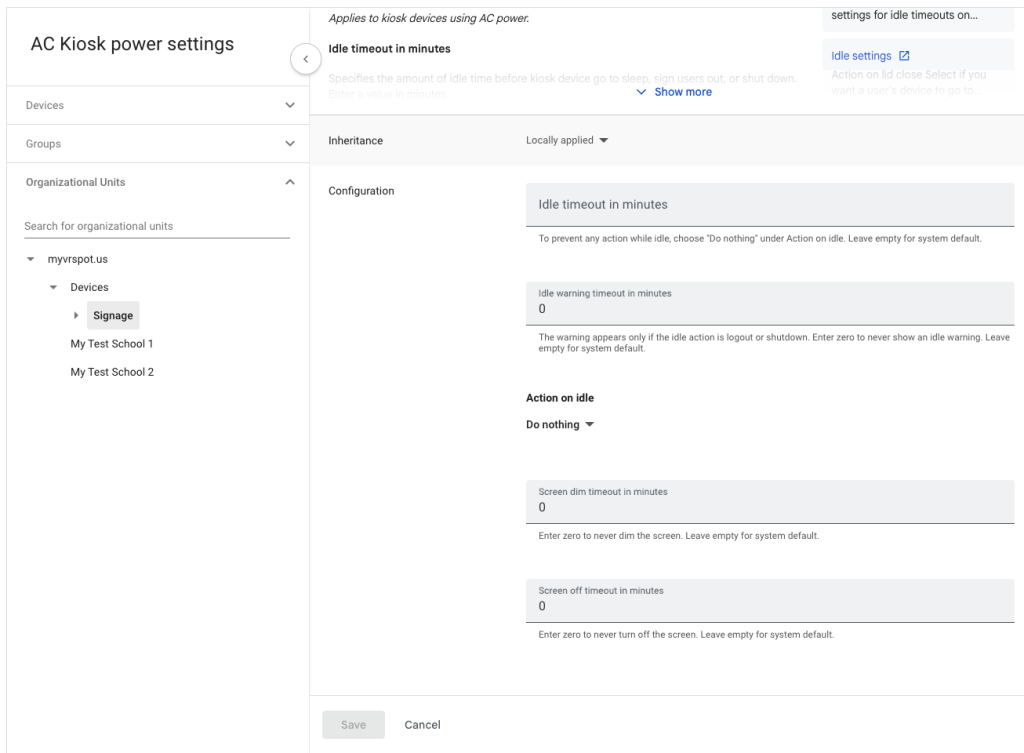
- Change the settings to reflect the following:
- Idle timeout in minutes: leave blank
- Idle warning timeout in minutes: set to 0
- Action on idle: select ‘Do nothing’
- Screen dim timeout in minutes: set to 0
- Screen off timeout in minutes: set to 0
- Click Save to keep your changes and you’re done!

