Getting Started with MyVideoSpot: A Step-by-Step Guide for Schools
Implementing a new digital platform across a school or district can feel like a daunting task. MyVideoSpot is here to help. Our video platform for schools is designed to be manageable for both administrators and educators. This beginner-friendly guide walks you through setting up your account, uploading media, managing user permissions, and sharing content effectively.
For technical deep-dives on any of these features, you can always refer back to the official MyVideoSpot User Guide.
Account Setup & Interface Basics
Accessing Your Account
While you can log in directly through the main MyVideoSpot page, the best practice is to navigate to your district’s custom login page provided by your IT team. From there, choose your preferred authentication method:
- Standard Login: Enter your assigned username and password.
- Single Sign-On (SSO): Authenticate instantly via Google, Microsoft, Classlink, or Clever using your school-issued credentials.
Navigating the Homepage
Once logged in, you will see a centralized interface tailored to your subscription:
- Left-Hand Menu: This expandable and collapsible sidebar grants quick access to primary account features and tools.
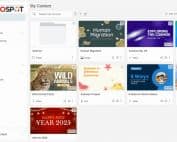
- Central Gallery: This is your primary hub, where you can search, sort, and filter through your media library.
- Internal Inbox: Accessible by clicking your name in the lower-left corner and selecting Inbox, this space stores internal alerts like team updates or shared files. Click Message Settings to opt into email notifications.
Customizing Your Profile and Layout
Clicking your name in the bottom-left corner opens your account settings. Depending on your administrative role, you can view details, update your avatar, or change your password. You will also find several tabs at the top of the page:
- My Preferences: Personalize your experience by adding or removing homepage widgets. Simply use the toggles to turn widgets on or off, and drag and drop them to rearrange their order.
- My Media Statistics: Keep an eye on storage limits and content usage data.
- Linked Accounts: Connect approved third-party integrations.
Uploading & Organizing Content
MyVideoSpot allows you to pull content from your local devices as well as cloud ecosystems your school already utilizes.
Uploading Media
- From Your Device: Click the Upload button in the left-hand menu to open the upload window, where you can browse files or simply drag and drop documents, images, or videos. If you have the Upload Widget enabled on your homepage, you can drag files directly onto the widget to skip a step.
- From Google Drive & Microsoft OneDrive: From the Upload screen, click your preferred cloud source. Grant MyVideoSpot permission to access your account, select your files from the pop-up picker, and import. Tip for Google Drive: To find files inside a specific folder, use the search bar dropdown to filter by “Folders”, double-click the folder, and then switch the dropdown back to “All file types” to reveal the contents.
- From Zoom: Select Upload from Zoom to view your cloud recordings from the past 30 days (use the date dropdowns for older files). Choose between “Audio Only” or “Video + Audio” and click Upload this Version. To revoke this access later, remove the integration via the Zoom App Marketplace.
- Embedding External Content: If you have files hosted elsewhere, click Embed Content. Provide a title, paste the external embed code, and save. MyVideoSpot natively supports embedding layout-heavy elements like Google Slides, Canva designs, Vimeo, YouTube, TikTok, Google Docs, and Google Sheets.
Managing Folders and Views
To keep your media library clean, click Create Folder in the top right of your homepage. You can assign folder permissions (e.g., Teachers and Above), nest it under a parent folder, and add a custom thumbnail with accessibility alt text.
- Uploading Directly: Avoid clutter by navigating inside a specific folder first, then clicking Upload to Folder.
- Gallery View vs. List View: Switch between views using the icons in the top right. Gallery View uses grid thumbnails for easy visual browsing. List View provides a checkbox system ideal for bulk actions like moving multiple files into a folder or deleting items concurrently.
- Favorites & Filtering: Click the star icon on any thumbnail to add it to your favorites. Filter your gallery using the funnel icon (to isolate videos, images, or projects) or sort your view chronologically or by view count using the three-dash sorting icon.
- Deleted Items: Accidentally delete a video? Click the trash bin icon near the gallery tools to visit Deleted Items. From here, you can restore files or permanently purge them. Note that items may be permanently removed automatically based on district retention policies.
Assigning Permissions & Admin Controls
Control who views, shares, and produces content with MyVideoSpot’s comprehensive administrative suite.
User Access Levels
The platform scales across seven explicit access levels. Administrators can only create or edit accounts at or below their own tier:
- State Admin / Consortium Admin: Full multi-district management.
- District Admin: Highest level of control for an individual school district.
- School Admin: Complete oversight over a specific school building.
- Teacher: Can manage personal media libraries and student content.
- User Plus: Student-level access capable of sharing media without prior approval.
- Student: Standard student access; requires teacher or admin approval before media can be shared externally.
To create or edit users manually, go to your name in the bottom-left, select Administrator Tools, and navigate to Create User or All Users. Fill out the required attributes, assign a role, and select their school building. Account provisioning can also be fully automated if your district utilizes Active Directory or LDAP.
Automated Google Provisioning
District Administrators can automate account creation using their district’s Google Workspace structure:
- Navigate to Administrator Tools > Google Provisioning. (Sandbox users should use the sandbox login portal).
- Choose to provision via Organizational Units or pre-configured Groups.
- Map the designated school building, select the corresponding organization path or group, and assign the default User Type (e.g., Student or Teacher).
- Click Create to establish the job, and notify MyVideoSpot Support once your provisioning mapping is complete.
System Settings & Usage Tracking
- School Sharing Settings: Within Manage Schools, District Admins can toggle privacy guardrails, such as defaulting all uploads to private, restricting student cloud integrations, or blocking students from creating shared links.
- Cross-School Sharing: By default, content is isolated to individual schools. Admins can cross-populate search results and shared Insights between distinct buildings by choosing Update School Shares under the Manage Schools menu. For seamless district-wide sharing, contact MyVideoSpot support.
- Usage Reports: Located under the miscellaneous section of Administrator Tools, these interactive tabs allow administrators to track user login frequencies, live streaming spikes, creation of interactive learning Insights, and data storage volume across customizable date ranges.
Sharing & Embedding Videos
Once your media is uploaded and organized, MyVideoSpot provides secure avenues for distributing content internally and publicly.
Adjusting File Attributes and Visibility
Click the three-dot menu (⋮) on any media file and select Update Attributes to access sharing modifications:
- Media Permissions: Change visibility from Private (the default) to Teachers and Above or All Users. Files must be shifted out of Private mode before they can be assigned to shared Groups (classes/departments) or Teams (collaborative project libraries).
- Download and Duplicate Controls: Toggle checkboxes to permit or restrict viewers from downloading your master file or duplicating it into their own libraries.
- Password Protection: Check Require Password for Public Viewing to apply a protective gate over content distributed outside of your login network.
Methods for Sharing Content
Click the Share icon on any asset to reveal your deployment options:
- Public vs. Private Links: A Private link generates an internal sharing URL that strictly requires viewers to be authenticated within your school district. A Public link allows anyone with the URL to view the content without logging in.
- HTML Embed Codes: Select Embed Code from the sharing mode dropdown, choose your desired dimension layout, toggle video looping if necessary, and copy the code into your school website or Learning Management System (LMS).
- QR Codes: Select QR Code from the sharing menu and click Generate. Download the graphic to place scannable video links onto printed classroom handouts, school flyers, or presentation slides.
- Sharing Public Folders: To distribute an entire batch of files simultaneously, open the folder’s attributes, turn on Share Folder with Link, and distribute the resulting folder URL via link, embed, or QR code.
- Featured Media: Administrators and educators can pin critical announcements directly to the user dashboards of their target audience. Open an asset, select Add to Featured Media, and designate the target role tier. Users will instantly see a notification badge next to their profile name, opening a sidebar containing direct pathways to the featured content.
Live Streaming Basics
MyVideoSpot enables school broadcasters to stream school events and daily announcements securely.
- Channel Setup: Go to Live Streaming, click your channel, and assign a unique Channel ID and Name. Toggle auto-recording to archive your broadcast automatically.
- Assign Streamers: Use the Streamers menu to authorize yourself or specific users to broadcast to the channel.
- Secure Authentication: Go to Streaming API Keys and generate a key. This allows encoders to connect securely without compromising your account’s primary login password.
- Configure Your Encoder: Click Share on your channel information page and select Streamer from the dropdown menu. Copy the RTMP Address and the Channel ID/Stream Key, and paste them directly into broadcast encoders like OBS, ensuring no empty spaces are copied.
- Go Live: Click start streaming on your encoder. Your live feed will broadcast according to your privacy rules (e.g., restricted to logged-in users or open to the public via password protection). If automated archiving was selected, the recording will finalize and can be configured to populate an attached archiving video Showcase automatically once processing wraps up.
Bring Video to Every Corner of Your Campus
Video content shouldn’t require bouncing between separate, complicated platforms. MyVideoSpot allows educators and administrators to have an intuitive, secure, and all-in-one hub designed to streamline multimedia, from in-browser video editing to ad-free live streaming and campus-wide digital signage. By bringing all your tools under one login, you can save valuable time and keep your entire school community securely connected.
Ready to see how easy school video management can be? Contact us today to schedule a demo or start your free 21-day trial.